Showing posts with label Photo Series. Show all posts

Tuesday, February 20, 2018

How and Why You Should be Getting in the Frame

Have you noticed that as mamas, we’re often too busy being behind the camera to ever make it into photos with our kids?
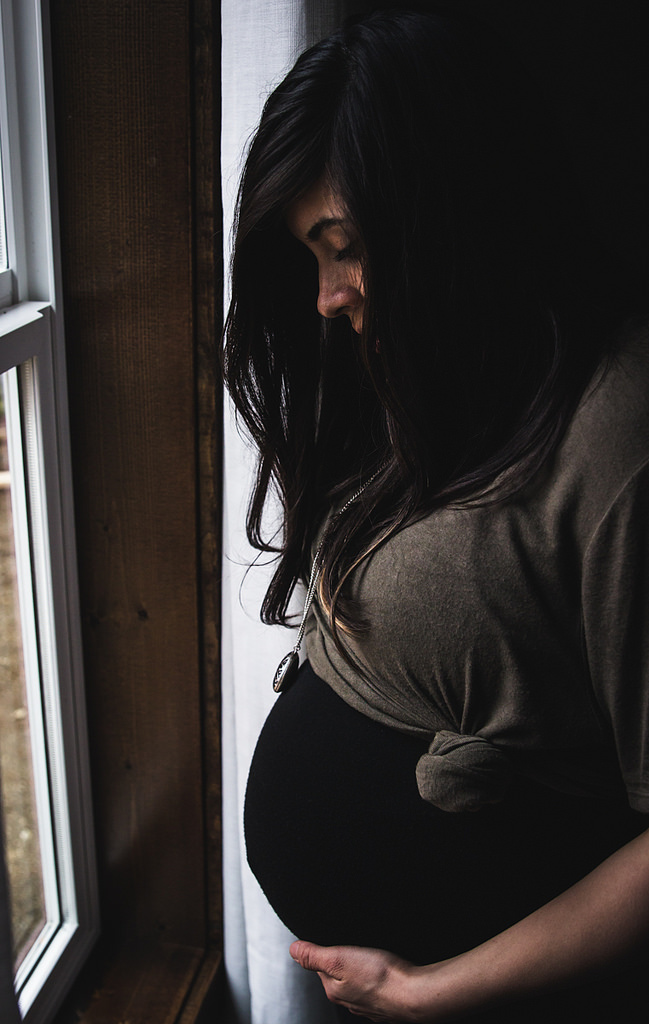
It is so important for us to get in pictures with our kids. I don’t know about you, but I love looking at old pictures of my parents. It’s important that our kids have pictures of us to look back on. It’s also important for us to have pictures of ourselves with our kids. There is nothing more precious than time spent with my son. Pictures documenting those moments are priceless to me.

Overcoming Insecurities

Motherhood is not always super glamorous.
I know that.
You know that.

Don’t let the insecurities get in the way of taking pictures with your kids. If like me, you struggle with feeling self-conscious in photos, you might find THIS helpful. It’s a list of my favorite tips to taking a more flattering photo.

The more confident you feel, the more likely you’ll be willing to jump in front of the camera instead of hide behind it.
It may surprise you that the more often you get in pictures, the more confident you’ll become. You’ll start to see yourself differently – and you should. Mama, you are so beautiful. You are strong and you are loved. Your kids adore you. You deserve to have pictures that capture that. Don’t hide behind the camera. Get in there!


Don’t take the easy way out

The easiest way to get in pictures with your kids is to hand off the camera to someone else. My husband doesn’t necessarily love photography the way I do, but he is always willing to take the camera and snap pictures of my son and I. Don’t be afraid to ask someone else to take the camera for a few minutes. It may feel as if you are being an inconvenience, but I think most people enjoy getting a turn to take pictures.
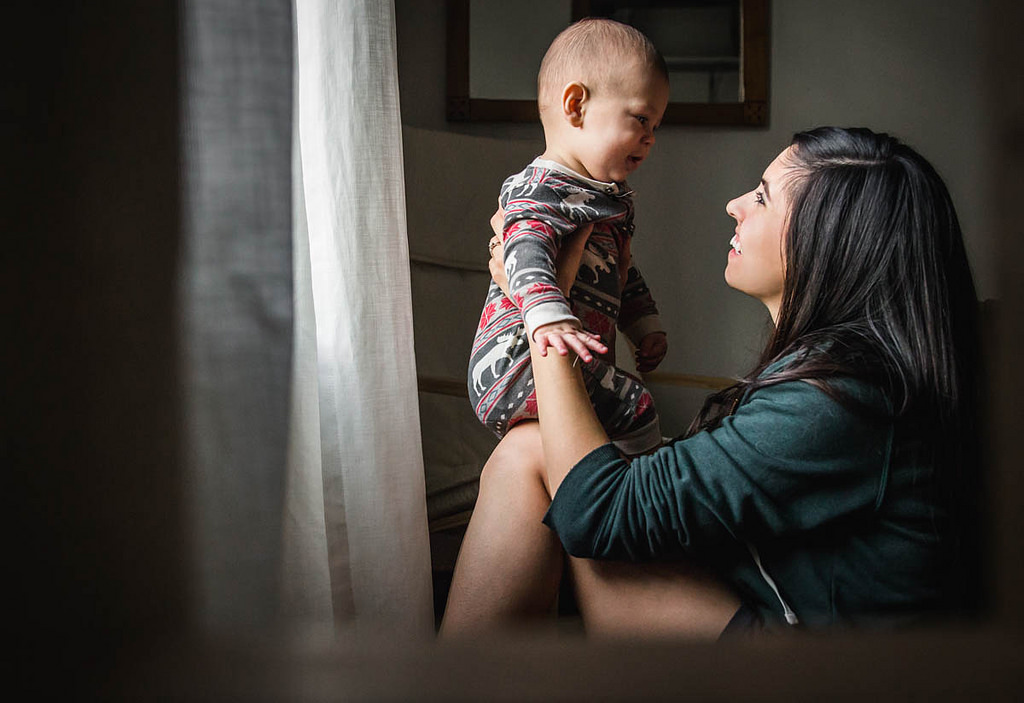
Don’t just rely on someone else though. Be intentional and learn how to take self-portraits with your kids – and I don’t just mean selfies! It doesn’t matter if you have a big fancy camera or a smart-phone – you have the ability to take beautiful self-portraits with your kids.


How to set up for a self-portrait

Ok. Stick with me. I know this is the most intimidating part, but I promise it’s not as bad as it seems. It takes a little bit of practice to perfect, but once you get the hang of it, it will become second nature.
If you’re using your smartphone there are a few ways to set up for a self-portrait.
  1. Set the self-timer and prop your phone up
  2. Use a remote
There are super affordable (I’m talking $8.00) shutter remotes made for smartphones that make getting in the picture really easy! This is what I use.

Tip: Even if you are using a remote, you should still set the self-timer. This gives you a few seconds between when the button is clicked and when the camera takes the picture. This allows you to hide the remote out of sight. If you don’t get the remote hidden in time, don’t sweat it. Some of my favorite pictures have the remote in view. Moments ALWAYS win.  


Next, pick a location, set up your phone, and take a few practice shots to make sure everything is working and in the right place. Then, and only then, grab your kiddo ;)
Use a remote or the self-timer and snap away.
Don’t worry about fancy poses or getting your kid to do something specific. Just interact with them normally! The last thing you want to do is make picture taking a frustrating experience for them – just keep it simple.


10 Ideas for Self-portraits with your kids

1. Read a book together
2. Play with a favorite toy on their bedroom floor.
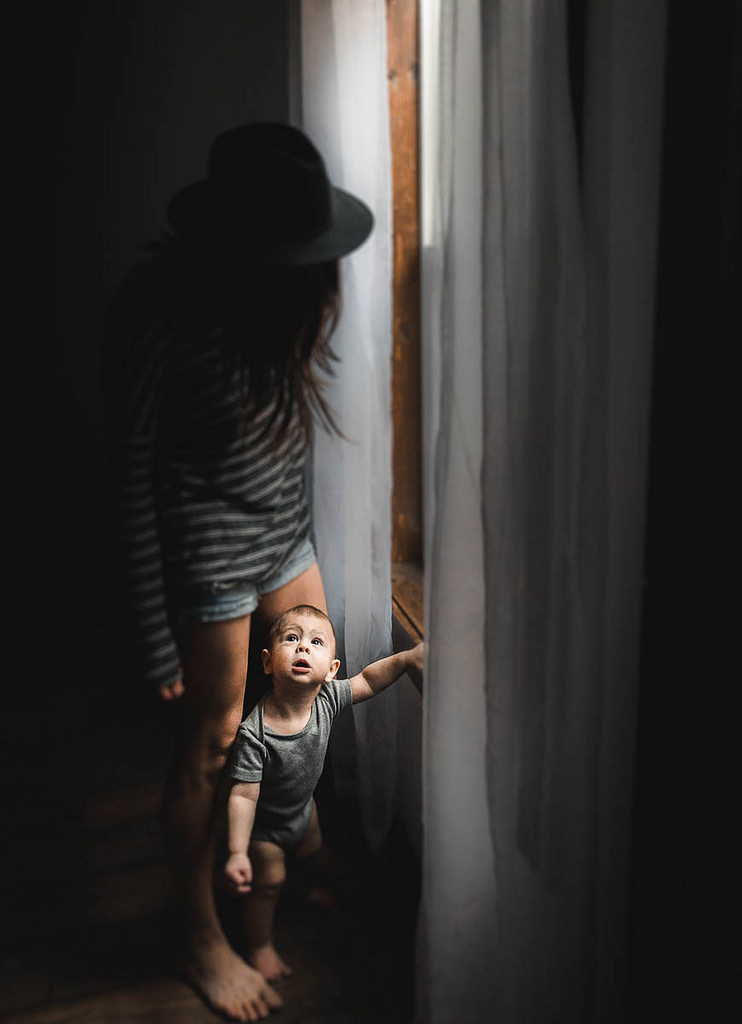
3. Look out a window and play “I Spy.”
4. Cuddle in your favorite chair.
5. Ask your kiddo to touch foreheads with you or give kisses!
6. Turn on music and dance in your kitchen together.
7. Jump on the bed together.
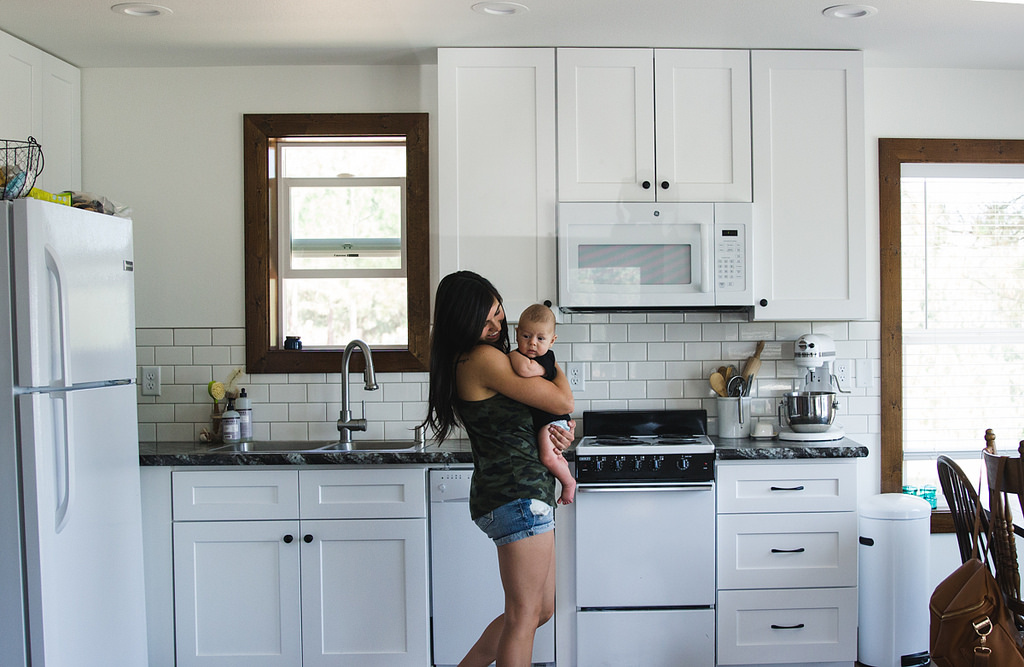
8. Think of special things you do together every day – an example of this might be helping them brush their teeth or get their shoes on. Documenting the mundane is my favorite.
9. Blow Bubbles!
10. Plain ol’ smile at the camera.

If you use your smartphone to take your pictures, I’ve made a PDF download for you of 12 tips for taking better phone photos! You can download it HERE.

If you ever get stuck editing your photos, come say hi over on Instagram! I have a few phone editing tutorials saved in my story highlights and I add to them often.


A Note on Using DSLR Cameras

If you’re using a DSLR camera, the same techniques apply. A tripod is helpful but not necessary. Same with a shutter remote (I use this tripod and this shutter remote). If you don’t have either, just use the self-timer).


The most challenging aspect of using a DSLR is nailing focus – it just takes practice. With a shutter remote you can click the button and wait for the camera to autofocus. You can also manually set your focus by placing an object in the frame in lieu of yourself, focus on the object, and then remove the object when you get back in the picture.  

Don’t let the technical aspect get in the way!


To Learn more about Jessie:


** This post contains affiliate links. All thoughts and opinions are our own.**

Sunday, November 30, 2014

Photo Series: Photography Gift Guide

Even though I have hung up my professional camera strap, I still get asked often advice on camera purchases and equipment. With the holidays just around the corner, and with awesome Black Friday/Cyber Monday sales going on, I thought I would share some of my favorite cameras, accessories, and gifts. 

Hands down digital slr cameras are the number one asked about purchase. There are multiple options and a crazy amount of debate which is the absolute "best" one, and I could go on and on and on about the technical aspects of each to you, but for 90% of you that would be a boring post. So here are some quick favorites. 

Two great beginner dslr cameras are the Nikon D3300 and the Canon EOS 100D. Both are great starter cameras, are easy to use and are compact. You can slip these in your purse with ease, and they are lightweight enough that you won't break your back carrying them around all day. Both are economical and will produce outstanding photo quality for just about any project you have in mind. Plus, I am not going to lie, the fun Nikon red option just screams "I'm the perfect Christmas gift. I am already well coordinated."


If you are looking to have a pro quality camera body, and have a little (read: a lot) larger budget to play around with, the Nikon D810 and Canon 7D Mark II are what you will want to focus on. I am going to fully disclose now that I am a Canon girl at heart and the latest model in my stash is a Canon 5D Mark II. Technology has advanced since that purchase, and now there is a Mark III option, but the 7D is a little more budget friendly for the everyday advanced user. 

A lot of inquiries I get start off a little something like, "What camera can I get to give me photos with the blurry background?". Now to get photos with the "blurry" background you have to do a wide range of things with your camera to achieve that look, and that my friends is a different post for a different day. One step closer to accomplishing that desired goal is to make sure you have the proper equipment. Lenses play a huge roll into the equation, and here are some of my starting suggestions. My first suggestion is always the 50mm 1.8. It is a great lens and very economical. Once you get a little more advanced and want a little better quality glass there are other options, but this is a great starting point. Another favorite starting lens of mine is the 85mm 1.8. You won't go wrong with either being in your bag. 

Some people still like to use point and shoot cameras. They are small, lightweight, easy to use and can fit in most everyone's pockets. These also make great gifts for grandparents who might not quite be on board yet with the smart phone era (Hi grandma and grandpa!!), or for pre-teens who aren't quite allowed a cell phone just yet, but have shown an interest in taking photos. My favorite option for years in this category has been the Sony Cybershot. At under $100 this is a great choice.


A few years ago, my husband and I went on a snorkeling trip while on vacation. Last minute we threw a couple of disposable underwater cameras in our bags and blindly shot all the beauty that we saw. Needless to say, when we saw the printed pictures we were a little disappointed. Now there are some fabulous options for affordable waterproof cameras. We purchased the Lumix Tough, but the Olympus Tough has gotten great reviews and comes in the fun red as well!

One camera that I added to my list simply because I think it is just flat out fun is the Fujifilm Instax Mini 8. I love that there are still instant film cameras out available and this little model is comes in a variety of colors and would make any party fun. 


Another fun camera/video option is the ever popular Go-Pro HERO4. If your husband is anything like mine this is on his wish list. This fun little camera can attach just about anywhere and give you such a unique view on photography/videography. And who doesn't like the fact that you can have your very own drone to coordinate with it?


One of the most important suggestions I can give anyone, regardless of what camera they want to use, is to make sure you have a good back up for all of your photos. Photos take up a lot of space on your computer, and you never know when something might happen to it. Get in a good habit of backing up your photos either in off site storage or with an external hard drive. I like to use the WD My Passport HD because it is small and comes in both Mac and PC compatible versions. 

If you are giving a camera as a gift this holiday season don't forget the accessories. Most digital slr cameras come with a camera strap but a fun patterned one is way cuter than the standard black one the manufacturers include in the kit. 

Also, don't forget a camera bag! Most beginner cameras do fit into a purse or are easy to throw over your shoulder, but once you start accumulating lenses, filters, SD cards, and other equipment you will want to have some where to store and protect your investment. There are tons of practical options out there, but I instantly fell in love with this fun plaid option!


Now if you already have a well stocked photographer in your household and want some fun alternative photography related gift options, I have some awesome finds for you. 

For the coffee loving photographer, how fabulous fun is this lens coffee mug


I loved these fun stud earrings I found in an Etsy shop. They were also super inexpensive, and would make a great stocking stuffer. I had to resist ordering myself a pair!


These little camera themed USB drives are perfect! Not only are they adorable, but they are practical and will make any photographer smile.


Right now at Target there are a ton of fun vintage photography themed office accessories. I loved these little photo/memo holders!


Hopefully for some of you this post was a little helpful. I tried to link as much as I could for additional information, but please feel free to email me with any questions! Happy shopping everyone!
 photo jensig.png


Follow us on Pinterest HERE.
Follow us on Instagram HERE.
View our Etsy Shop HERE
Follow us on Tsu HERE


**This post does contain some amazon.com affiliated links.**

Monday, September 22, 2014

Photo Series: How to Dress For Photos

Happy Monday Everyone! I promised you guys if you made it through my composition post I would post about what to wear in family photos next. This is such a fun topic, but often one of the more stressful aspects it seems for people when they prep for a shoot.

With its beautiful crisp weather, dreamy afternoon light, and holidays on the horizon, Fall is the busiest time of year for photos. Here are some quick tips and suggestions to hopefully help you if you have a shoot planned for your family this season.

Tip #1: Coordination
Trends today in photos lean towards well coordinated outfits, and away from matching identically. My best advice to families is to think of how you look in everyday life. You don't walk around all wearing red shirts and jeans on the same day, so you won't want to wear that in your photos. You want your photos to represent you and your family's style. Try to think of a few colors that you and your family tend to lean towards the most in your wardrobe and use that as your platform. Pick a few colors and mix and match those colors amongst your family members so that as a group as a whole you will coordinate.

Tip #2: Don't Be Afraid of Color
On camera dark colors, jewel tones and bright colors usually make everyone look great regardless of skin tone as well as "pop" on camera. White tends to wash certain skin tones out on camera so be mindful of that.

Tip #3: Be Comfortable
When making your outfit selections make sure you try on the outfit several times and ensure that you and your little ones are comfortable. You want to not only look good in the outfit but make sure that you can move in it as well. You'll be sitting, standing, and posing in a variety of positions for about an hour, and you don't want to be uncomfortable while doing that. If your little one is fighting you on a certain pair of shoes or a headband that's uncomfortable then rework that portion of the outfit before the shoot so that it's not a fight during the session.

Tip #4: Check the Weather
I can't say this enough...check the weather. You don't want to plan for outfits involving sweaters and then it be 80 degrees out, or plan for short sleeved dresses and a cold front come through. The less sweating/shivering everyone is during the shoot, the more enjoyable experience it will be.

Tip #5: Don't Forget the Details
The little details that complete an outfit can actually help tie everything together. Shoes can add a pop of color where it's needed. A scarf can not only provide warmth, but add a fun pattern to tie colors together. A belt, a pair of earrings, a bow...the little details can make a big impact in a fun way.

Tip #6: Have Fun!
At the end of the day don't stress. Pick something that is a good reflection of your family's style and have fun with it. These photos are for you, and the more relaxed and comfortable you feel, the more that will shine in your photos.

To help spring board some ideas for you, I've pulled together some looks for you guys. There are tons of great ideas on Pinterest for inspiration. I pinned some of my favorite Fall combos on a board HERE.

Then I took it a step further and pulled together three combinations of my own. I usually tell people to look towards their own closets for inspiration, and to use pieces they love that they already own, but sometimes you just want an excuse to shop.  Who doesn't?

I tried to pull looks from three different retail stores at three different price ranges with pieces that are all currently available in stores. To view individual pieces and pricing click on the link below each picture.


Look 1: Nordstrom Nordstrom Family Photo Option #1


Look 2: Old Navy
Old Navy Photo Options

Old Navy Photo Options by themagnoliamamas featuring suede shoes


Look 3: Target (Note: This one was a little tough as things kept being listed as sold out. Hopefully items, or similar items, will become available soon.)
Target Photo Options

Target Photo Options by themagnoliamamas featuring a statement necklace

Hopefully this helps you during this year's photo session!

 photo jensig.png

Wednesday, September 10, 2014

Photo Series: 5 Quick Composition Tips

Over the years as a photographer, I have received a lot of questions from friends, family, and clients seeking advice on how to take better photos. I tried to help as best I could, but I would see people's eyes glaze over as I began explaining ISO, metering, and shutter speed calculations. When it came to teaching photography, I realized I was awful at explaining something that in my head I just get. 

So, when it was suggested that I do a series on the blog about photography at first I shied away from the idea. There are tons of tutorials online written by much better photographers out there than I. But then, bouncing ideas off the Hubs, I realized I could talk about the less technical side of photography, and still teach in a fun way how to get more interesting photos regardless of what level of skill or equipment you have. 

We will see. Are you still awake so far? Or did you check out at ISO?

Today, to kick off the series, I thought we would start with Composition. Yes, slightly technical, but an easy skill to master whether using anything from a DSLR to an iPhone. Make it through this, and I promise my next blog will be about something much more exciting...like coordinating your holiday photo outfits. (Trust me, I can talk about that one ad nauseam. I own that topic.)  

1:Rule of Thirds
This is probably one of the first rules as a photographer that you learn. Most of the time when you take a photo the natural inclination is to put what you are shooting dead center in the frame. However, the human eye tends to want to draw towards something in only one third of that shot. To make your photo slightly more interesting, your goal is to put your subject in one third of your image. 

If you are taking a photo of a person, their eyes looking at you is usually the actual subject. Your goal is to place their eyes in one-third of your frame. For example, this adorable little boy. His eyes are in the upper right third of the image. 


2: Keep the Horizon Straight
Crooked horizons tend to distract the eye, and make subjects look like they are going to slide off the photo. There are a lot of artistic differences about this rule. My thoughts are be mindful now, and get fancy with your tilting occasionally if you are a rule breaker at heart. 


**Fun tip, most editing programs have horizon corrections functions in case you realize your background tilted. Even free programs, and apps like Instagram have them.**

3: Fill Your Frame
Another quick way to make your photos more interesting is to fill your entire frame with your subject. Don't be afraid to get super close to your subject. Capture all those tiny details.


4: Be Careful of your Background
Before you take a photo or place a subject somewhere, check out what's behind your subject. You want to make sure there's nothing sticking out of their heads or anything that will draw your eye away from your subject.

Sorry cute baby, there's a tree growing out of your head.

5: Negative Space
Negative space goes against your natural tendency to want to place a subject in the middle of the photo. But a quick and fun way to make your photo more interesting is to place the subject in mind on one side of your frame (left, right, top or bottom) and leave the rest blank.

There are a lot of creative crafty ideas you can do with negative space as well, but we will save that for a future post. 


Ok, that's a wrap. Hopefully it will be a little helpful! Or if you passed out around number two, hopefully you got a really awesome power nap in.

Until next time!
 photo jensig.png

P.S. Don't forget today is your last day to enter our Burlap Football Door Hanger Giveaway!!!! Enter HERE.


Related Posts

Related Posts Plugin for WordPress, Blogger...