Showing posts with label Kids crafts. Show all posts

Monday, December 19, 2022

How to Make Santa Slime

 It is no secret that kids love slime. That ooey, gooey and, for lack of a better word, slimey pile of fun is the perfect way to keep those little (and sometimes big) hands occupied this holiday season. Create this Santa Slime together, surprise them at their class party, or have it on hand during those long holiday meals that might not otherwise keep little ones attention. This Santa approved activity will keep everyone on the Nice List!


Clear Slime Recipe

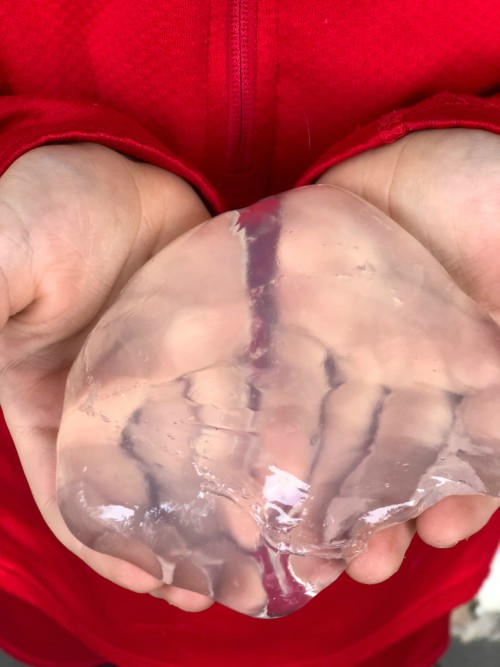
To make Santa Slime you can use white or clear slime, but we chose clear slime so our mix-ins would stand out a bit more.


Ingredients:
1/2 cup clear craft glue
1/2 teaspoon borax
1 1/2 cups hot water, divided


Directions:
1. In a large mixing bowl, combine 1/2 cup of glue with 1/2 cup of hot water and mix well.
2. Mix 1/2 teaspoon of borax into your remaining 1 cup of hot water and stir until borax has dissolved.
3. Pour borax water mixture into glue mixture and stir. Ingredients will start to form slime.
4. Continue mixing and kneading with you hands to mix as much of the borax water mixture as possible.
5. Pour out excess water and remove slime from bowl. Continue kneading slime in your hands several minutes.

Note: To get crystal clear slime you will need to let it sit a few days in an airtight container without playing with it.


Santa Slime Mix-Ins

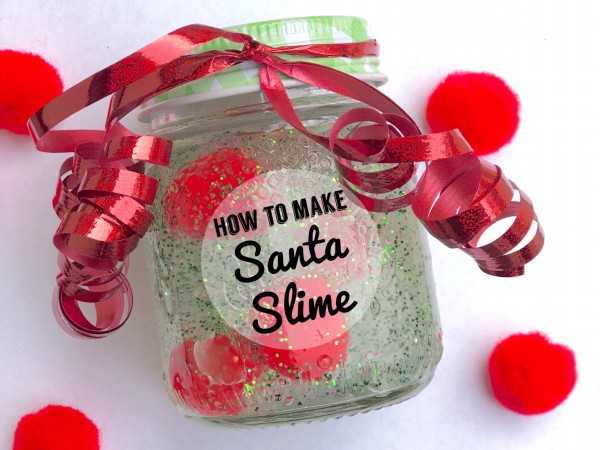
Once you have your basic clear slime created you can add all sorts of fun items to make your Santa Slime. Our favorites are glitter and colored craft pom-poms, but we have also used buttonsbells and sequins, too!

The more you play with your slime the stretcher it will get and all of these mix-ins become a fun sensory experience.


Share Santa Slime

Our kids aren’t the only ones that are slime obsessed…their friends all love it, too! We thought it would be fun to make and package up some Santa Slime for their friends. Storing in an airtight container is key so we used little mason jars. Adding a quick ribbon turns this simple gift into the perfect present!


Come spend the day with us on:

Wednesday, April 18, 2018

Painted Rocks

Unless you've been living under a rock (see what I did there :-)), you've probably heard about the painted rock project.  It started as a way to help bring inspiration to others that may need it and has turned into a huge movement that swept across the country. The basic idea is you paint rocks with any sort of design, quote or saying and then "hide" them for others to find.


Simple, right?  Well, just imagine the smile it might bring to someone's face to find a rock with a word of inspiration outside of a doctor's office or for a child to find a cute painted rock on a playground.  The possibilities are endless.  We've found a few painted rocks around town and and it is always such a pleasant surprise that brings a smile to my kids' faces.

Last summer this seemed to be gaining popularity and I kept thinking I wanted to make some painted rocks with my kids.  I kept putting it off, but now we've painted rocks a few different times and the kids love it!

We collected rocks from several different sources.  Some came from our yard, some I bought in a decorative set at the dollar store and some were left over from my in-law's landscaping project.  You can order decorative rocks to use for this kind of project or pick them up from your local landscaping store.


One time I let the kids paint the solid colors first and let them dry before adding their designs.


It took a while for them to get completely dry though, so the next time I spray painted a lot of them to have a solid background before they started. I did find that spray painting them ahead of time was better and less of a mess.


Then we invited some of their friends over for a painting party and they got to work!  I used plastic tablecloths under where they were working to save my furniture and then one time we painted them outside!


We used paint pens because it was easier for them to get the designs they wanted by just drawing on the rocks rather than trying to use a tiny paint brush to do it.


After they dried we stuck them in the car with us and started hiding any place we could think of.  When we went to sports fields, when running errands around town, at the playground, school and park.  The kids loved finding special places for the rocks and hoping that someone would come along and be excited to find their creations.


It was such a simple and easy little project to do, but so much fun.  I know it brought a smile to my kids' faces and we're hoping that whoever found their rocks would be smiling, too!


Follow us on Pinterest HERE.
Follow us on Instagram HERE.
Follow us on Facebook HERE.
Follow us on Twitter HERE.

***This post contains some affiliate links.***

Monday, November 20, 2017

Thanksgiving Busy Books for Kids

Happy Thanksgiving week y'all! I am SO EXCITED to have a whole week off with my little family! We are hosting this year, and am putting all the finalized touches on the dining room, scouring my cook books for some yummy recipes, and wrapping my mind around the fact we are in charge of the turkey this year (fingers crossed!).

Thanksgiving is such a fun holiday, but the meal can be LONG. My kids rarely can sit through a normal meal, let alone a meal with several courses. So, I came up with a fun and personalized way for them to want to sit a little longer. I created these Thanksgiving Busy Books.


I learned long ago the kids table is where it's at. It's where all the fun happens during the holiday meal times. My kids tend to be the only children at holidays, and sometimes the kids table is just an extension of the adult table. And that means lots of sitting. I usually try to put out little games or something small and fun for them to fidget and play with during the meal. This year I created these fun little busy books for them.


It was a project I thought would take a long time, but in reality it took only about ten minutes. Each book is filled with fun coloring pages, interactive games and questions for them to play with, and age appropriate activities.


I'm dishing on all the details on how to create a Thanksgiving busy book for your own kids on Savvy Sassy Moms. Make the hop to grab all the coloring pages, activities, and games. With just a few clicks your kids table just got a whole lot more fun!

How to create a thanksgiving busy book for kids. A super fun and easy way to entertain children during Thanksgiving!


What are some fun activities you have for kids to do during long holiday meals? We'd love to hear your suggestions!

Jen

Follow us on Pinterest HERE.
Follow us on Instagram HERE.
Follow us on Facebook HERE.
Follow us on Twitter HERE.

Monday, January 30, 2017

DIY Tassel Bracelets for Valentine's Day

I know I've said this a ton of times here before, but I just love holidays and any excuse to decorate my house.  Over the weekend I pulled out my Valentine's Day bin from the basement and went through it.  It mostly holds left over Valentine craft supplies, books, etc., but I do have a few things I put around the house like this super cute hand hooked pillow. 


I also hang up my Valentine's Day wreaths on the front doors.  


Like I mentioned though, most of the Valentine's Day bin is stuff for the kids.  All sorts of cutout hearts, doilies, stickers and more.  This year I got some beading supplies for the girls to make DIY Tassel bracelets for Valentine's Day.  


They LOVED making the tassel necklaces a few years ago and still wear them all the time, so when I saw these Valentine tassels already made from Oriental Trading, I knew they would love them.  


We set up our bracelet making station in the playroom and got to work matching colors and trying to decide how their bracelets would look. 


We used this elastic cording to string the beads and one little tip that I will share that really helps from having the beads fall off as they are stringing is to tape one end of the cording to the table.  That way it is secure and no need to worry about beads rolling all over the table.  Then, when they are finished stringing the beads just tie it off in a few knots and they are all done! 


The girls were very detailed in their bracelet making and wanted them to look just right. I loved these sets because while the hearts and colors are perfect for Valentine's Day, they can also be worn year round! This Little Mama LOVES her some arm candy so I know she'll be putting her bracelets to good use.  


We were SO impressed with the way they turned out. I mean, so cute!  We all kept saying they looked like something you would buy from a store! :-)


They each made a few and then I got to try my hand at making one, too! 


I've linked all of the beads and supplies we used below, but there are tons and tons of options at Oriental Trading to create something similar to totally unique.  


While the girls were busy beading, Boo-Boo was digging through the Valentine's Day bin and found this awesome heart ring toss game.  


I bought this when Little Mama was in pre-school for her class Valentine's party and have used it almost every year since.  Being the room mom I'm often in charge of party activities and I have gotten my money's worth with this set.  Because it is wooden, it has held up year after year.   


As you can see, this guy had so much fun playing with it and the kids always do!  It was such a great purchase years ago and I just check and they still have it!  They also have an Easter Egg version that I also own.  When you find something that works and that the kids love, apparently you buy it for every holiday! 


Check out all that Oriental Trading has to offer for Valentine's Day HERE.  Including tons of cute Valentines to pass out to classmates.  Now that I think about it I should have gone ahead and ordered some. Please tell me I'm not the only one with very opinionated and indecisive children make that shopping task almost impossible!  

 photo cbsignature.jpg

Follow us on Pinterest HERE.
Follow us on Instagram HERE.
Follow us on Facebook HERE.
Follow us on Twitter HERE.

I was given these beading product by Oriental Trading in exchange for my review. All thoughts and opinions are my own. 

Thursday, April 21, 2016

Recycled Glitter Sensory Bottle


Happy Earth Day Eve everyone! Today we are going to share a fun, and easy craft that is not only made from a recycled bathroom products, but it is a great sensory tool for your little ones!

Easy Glitter Sensory Bottle Craft for Kids

I'm not sure about you, but a large majority of our weekly recycling comes from our bathrooms. The shampoo bottles, the toilet paper rolls, the bandaid boxes - it all starts to add up. Especially if one of The Cutes decides to play their favorite game - the "Let's unroll all the toilet paper, and spread it around the house" game.


Because we go through so many products so quickly, sometimes I like to look towards the bathroom recyclables for some craft inspiration. Sometimes a toilet paper roll becomes a race car tunnel, sometimes a shampoo bottle becomes a paint squirter, and sometimes an empty tissue box just becomes a tool to store fun treasures of the day in. Regardless of the item, with a little imagination that recyclable can have a second life before it officially hits the recycle bin. 


Today we are all about turning an old baby oil bottle into a new sensory craft. We love to make sensory bottles, and this glitter one is easy - using only a few supplies and only a minute or two of your time. Not to mention, the glitter sensory bottle is also an effective calm down tool - what parent wouldn't love that? ;) 

Before we start, just a few tips to keep in mind when it comes to using bathroom recyclables: 
  • Double check with your local recycling agency what they accept. Try to create and give a second life to a product that can't otherwise be recycled. For example, floss containers or lotion pumps contain multiple parts and #5 plastics; therefore, most recycling facilities won't accept them. What new uses can you create using these items? 
  • Try not to put too much paint or glue on your chosen craft when using a recyclable product. These can create a problem for the machines handling the recycling process, and then would no longer be recyclable. 
  • Avoid cutting large bottles as this might prevent recyclables from entering the recycle machines properly, and thus rendering them non-recyclable. 
Ok, now for the craft...


GLITTER SENSORY BOTTLE

Materials Needed: 
- One clear bottle with top
- Water
- Glitter glue or clear glue and glitter color of your choice
- Food coloring if desired


Instructions: 
1: Make sure your bottle is clean. Rinse until all product residue has been removed, and dry. 
2: Fill bottle approximately 3/4 of the way with luke warm water.
3: Add a few drops of food coloring if desired.


4: Fill remainder of bottle with glitter glue (it should take the whole bottle or almost all depending on the size of your container).

Note: The glue sinks all the way to the bottom. 


5: Close the bottle with the top, and then shake until glue is fully dispersed amongst the mixture. (Note: We love the baby oil tops because they are baby proof. If your container is not baby proof, consider glueing the top down.) For added fun let the kids shake it up.


6: Just keep shaking. Now your little one can enjoy just shaking and watching all the glitter gracefully float around the bottle.


Such a fun and simple craft to do with materials we already had at our disposal, and The Cutes get a great lesson on being able to see what they think of as trash as treasure.


And they love coming back to their glitter sensory bottles over and over again to watch the glitter float. It's calm. It's quiet. It's fun. And it's about the only non-messy glitter craft on the planet. I'll take it!

If you are looking for more tips and tricks to transform your bathroom products into recyclable DIY projects take a peek at the Johnson & Johnson Consumer Inc. Care To Recycle website. Johnson & Johnson has created this fabulous recycling program to serve as an informative reminder of what personal care items can recycled, showcase some tips to making recycling easier in your bathrooms, and share some absolutely fabulous DIY and craft projects you can make with your recyclables to give them a second life. I love the darling bottle vase DIY!

What crafty idea do you have to transform your bathroom recyclables? 

Happy Earth Day everyone!

 photo jensig.png

Follow us on Pinterest HERE.
Follow us on Instagram HERE.
Follow us on Facebook HERE
Follow us on Twitter HERE


I was selected for this opportunity as a member of Clever Girls and the content and opinions expressed here are all my own.

Related Posts

Related Posts Plugin for WordPress, Blogger...