Showing posts with label easy dinner recipes. Show all posts

Sunday, June 4, 2023

Kitchen Confessions: Easy Fish Tacos

It's been a minute since we've been on here.  Lots of life happening and just not a lot of time for blogging, but we're slowly settling into a summer routine and that means just a little more free time on the horizon. Time to enjoy family, time to enjoy the sunshine, and time to actually cook a good dinner! 

There is something about summer that makes me feel like we should be eating more seafood. We've had some Mahi Mahi in the freezer for a while from a fishing trip the Mr. took this spring and I found THIS recipe online for fish tacos. 

They were SO good. My family was so impressed and they tasted like something you'd have at a restaurant. So yummy! The fish was seasoned just right and I think the other key was having all the best toppings including the tacos sauce that the recipe shared.

Fish Taco Ingredients: 

small flour tortillas 

1 1/2 lbs. white fish of your choice 

1/2 tsp ground cumin 

1/2 tsp cayenne pepper 

1 tsp salt 

1/4 tsp black pepper 

1 Tbsp olive oil 

1 Tbsp butter 


Fish Taco Toppings: 

1/4 purple cabbage 

2 avocado, sliced 

tomato, diced 

1/2 diced read onion 

1/2 cup Catija cheese, crumbled

1 lime cut into wedges


Fish Taco Sauce Ingredients: 

1/2 cup sour cream 

1/3 cup mayo 

2 Tbsp lime juice 

1 tsp garlic powder 

1 tsp Sriracha sauce 


Instructions:

1. Line baking sheet with parchment paper. In small dish combine seasonings and sprinkle evenly over both sides of fish. 

2. Lightly drizzle fish with olive oil and dot each piece with butter. Bake at 375 for 20-25 mins. 

3. Combine all taco sauce ingredients in medium bowl and still until well blended. 

4. To serve tacos, quickly toast the corn tortillas in large dry skillet over medium/high heat. 

5. Assemble starting with pieces of fish then add toppings and taco sauce. Serve with fresh lime wedge to squeeze over tacos. 

6. Enjoy! 


Follow us on Pinterest HERE.
Follow us on Instagram HERE.
Follow us on Facebook HERE.
Follow us on Twitter HERE. 


Monday, August 1, 2022

Kitchen Confessions {Lemon Garlic Mahi Mahi}

A few weeks ago I got a wild hair and decided to try out a new recipe.  You know I'm all for easy and quick dinners that will make everyone happy.  When I came across this Easy Perfect Mahi Mahi recipe I decided to give it a try.  We've got a freezer full of fish that the Mr. caught on one of his fishing trips, but I never seem to be able to cook it just right...until now.  

This tasted like something from a restaurant!  Seriously so good and it really was simple to make.  I did the lemon garlic butter ahead of time and the fish cooks quickly so it was a simple weeknight meal and something everyone loved. I will definitely be making it again! 

Lemon Garlic Mahi Mahi 

Lemon Garlic Butter Sauce 

Ingredients: 

2 TB salted butter, softened

1 TB chopped parsley 

2 TB garlic cloves, minced (I used the kind in a jar)

1/8 tsp salt 

1/4 tsp ground pepper 

1 TB fresh lemon juice 

Fish 

Ingredients: 

2 TB olive oil 

4 (1- inch thick) Mahi-Mahi fillets 

salt and pepper 


Directions: 

1. Preheat oven to 400 F with rack on middle position 

2. Add all ingredients for lemon garlic butter sauce in a small pan and stir to fully combine. Set aside. 

3. Pat dry all excess moisture from the fish with paper towels. Sprinkle evenly both sides with salt and pepper. 

4. In a large oven-safe skillet heat olive oil over high heat. When oil is hot add fish fillets and cook until browned on one side (about 3-4 minutes). Carefully flip fillets to the other side and immediately transfer to pre-heated oven. 

5. Roast fish for 4-5 minutes until top is golden and center is cooked through. 

6. While fish is cooking warm lemon garlic butter sauce over medium heat. 

7. Remove fish from oven and top with butter sauce. Garnish with extra lemon slices. 

8. Enjoy! 

Follow us on Pinterest HERE.
Follow us on Instagram HERE.
Follow us on Facebook HERE.
Follow us on Twitter HERE. 

Friday, February 18, 2022

Kitchen Confessions: Easy Crockpot White Chicken Chili

Happy Friday, everyone!  We've been lucky enough to have some warm-ish weather this week and it has been so nice to be able to get outside without bundling up. Unfortunately, the cold is back today and it has me in the mood for a good crockpot meal.  


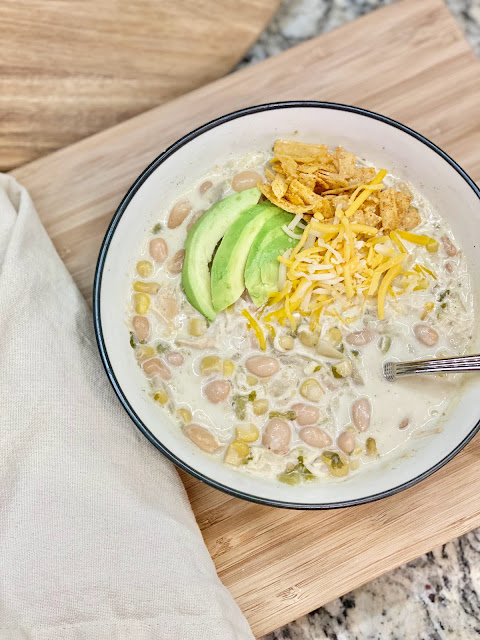
A few weeks ago I shared my quest for easy weeknight meals and my love of the crockpot.  I've got another yummy recipe to share today...Easy Crockpot White Chicken Chili! In full disclosure, my kids liked the Easy Crockpot Potato Soup better than this, but I loved this one and thought it was definitely worth sticking around in the dinner rotation. 


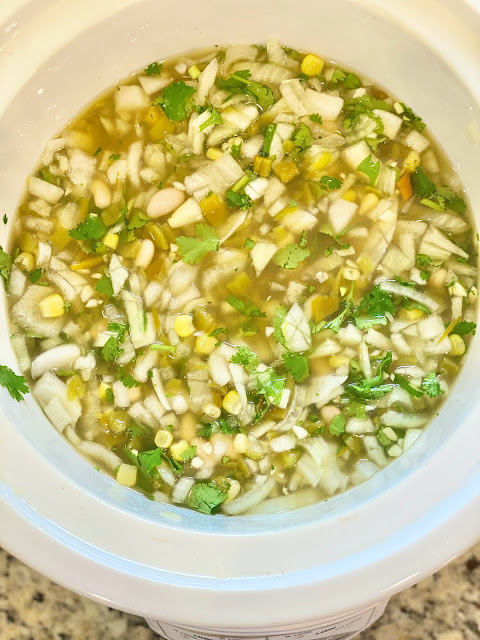
At first look this was *almost* too many ingredients and a little more prep time with the dicing and chopping for my liking.  In the end though, it was actually super easy and worth the little extra time. 

Easy Crockpot White Chicken Chili 

Ingredients: 

1 lb. boneless/skinless chicken breast 

1 yellow onion (diced) 

2 cloves garlic (minced) 

2 cans chicken broth 

2 cans great Northern beans (drained and rinsed) 

2 - 4 oz cans diced green chiles 

1 can whole kernel corn (drained) 

1 tsp salt 

1/2 tsp pepper

1 tsp cumin 

3/4 tsp oregano 

1/2 tsp chili powder 

1/4 tsp cayenne pepper 

small handful fresh cilantro (chopped) 

1 block cream cheese 

1/4 cup half and half 

Toppings: 

shredded cheese 

tortilla strips 

sour cream 

sliced avocados 

Directions: 

1. Add chicken breast to crockpot, sprinkle with salt, pepper, cumin, oregano, chili powder and cayenne pepper. 

2. Top with diced onion, minced garlic, great Northern beans, green chiles, corn, chicken broth and cilantro. 

3. Cover and cook on low for 6-8 hours or high for 3-4 hours. 

4. Remove chicken breast and shred using two forks, then return to crockpot and stir. 

5. Cube cream cheese block into 1 inch pieces. Add cream cheese and half and half to crockpot. Stir and cover for an additional 20 minutes. 

6. Stir well and serve with toppings! 


Follow us on Pinterest HERE.
Follow us on Instagram HERE.
Follow us on Facebook HERE.
Follow us on Twitter HERE. 

Wednesday, February 9, 2022

Kitchen Confessions: Easy Crockpot Potato Soup

Do any of you struggle with what to cook on a busy weeknight?  Jen and I were talking recently how we need easy meals that can be ready for our families to eat whenever they are home because these days it feels like everyone eats in shifts.  With everyone's practice and sports schedules it is rare that we are all sitting down to eat at the same time during the week. Some of us eat at a normal dinner, some eat a little something before practice and others eat super late after practice.  

Enter my favorite kitchen appliance...the crockpot!  There is nothing I love more than putting everything in it earlier in the day and having your dinner ready that evening.  It keeps food warm so people can eat in shifts and usually means there are less pots and pans to clean up.  

When I'm looking for recipes if it has too many steps or too many ingredients I'll usually avoid them.  Also, too much prep before is usually a no-go for me.  I like the "just pour it all in and let the crockpot do it's magic" kind of recipes. 

In an effort to branch out a little and try some new recipes I found a winner. I've made Potato Soup in the crockpot before, but it has been a while so I took a look at a few different recipes and sort of combined them all to make my own.  

Easy Crockpot Potato Soup 

Ingredients: 

1 32 oz bag frozen cubed hash browns 

1 can cream of chicken soup 

2 cans chicken broth 

1/2 cup chopped onion

ground pepper to taste 

1 (8 oz) package cream cheese 

Optional toppings: 

shredded cheddar cheese 

crumbled bacon 

sour cream 

green onions 

Directions: 

1. Pour frozen hash browns, cream of chicken soup, chicken broth, chopped onions and pepper in a crockpot. 

2. Cover and cook on low for 5-6 hours. 

3. Cube block of cream cheese and add to crockpot for 30 minutes.  Stir occasionally. 

4. Once all cream cheese has melted into the soup, use a potato masher, big spoon or spatula (my utensil of choice because I don't own a potato masher) to smoosh hash brown pieces into a smooth, creamy consistency. 

5. Stir well and serve with desired toppings!  

My kids loved this and my daughter told me I should make it ALL the time.  I'd say that is a dinner winner and is totally going to be added into the dinner rotation at our house. 

Follow us on Pinterest HERE.
Follow us on Instagram HERE.
Follow us on Facebook HERE.
Follow us on Twitter HERE. 

Wednesday, February 10, 2021

Kitchen Confessions {Air Fryer Salmon}

I mentioned a few weeks ago that I've been loving my air fryer and we've tried all sorts of things in it. Last week I shared my Air Fryer Brussels Sprouts (SO GOOD) and the Mr. made wings in it for the Super Bowl. For me it has made weeknight dinners easier to put together because it cooks things so much faster. I have the Cosori air fryer and have been really happy with it.  It thousands of great reviews on Amazon, too! 

One of my favorite things to cook in it that is super easy and quick is salmon!  I've always been a salmon fan, but after trying this new way of cooking it, I won't ever be going back.  This recipe calls for a little bit of brown sugar and it caramelizes so nicely. The top of the salmon browns, but it keeps in all of the juices and it is really tender.  


Air Fryer Salmon 

Ingredients: 

-2 salmon fillets with similar thickness 

-2 tsp olive oil 

-salt and pepper 

-2 tsp paprika (I don't really measure though...just kind of sprinkle some on)

-1 Tbsp brown sugar 

Directions: 

1. Rub each fillet with olive oil and season with salt/pepper, paprika and brown sugar. 

2. Place fillets in the basket of the air fryer, skin side down. 

3. Cook at 390 degrees for 8-12 minutes depending on your desired doneness. As you can see from the picture, I prefer mine more done so did them the full 12 minutes, but you can adjust the cooking time to fit your preference!  If you prefer your salmon a little less done I would start with 8 minutes and check it before adding a few more minutes to the cooking time. 

That's it!  Just add a veggie or salad and you have a great healthy meal.  Let me know what you are cooking in your air fryer...I'm always looking for new ideas! 

Follow us on Pinterest HERE.
Follow us on Instagram HERE.
Follow us on Facebook HERE.
Follow us on Twitter HERE. 

Thursday, August 6, 2020

Kitchen Confessions: Crockpot Zesty BBQ Chicken

Earlier this summer I was watching some Instagram stories and came across a recipe that one of my favorite influencers shared.  It sounded really good, really easy, and used my favorite kitchen appliance...the crockpot!  I was sold and decided to give it a try.  This zesty BBQ chicken recipe was perfect for my family.


I loved that I could prep everything ahead of time and let it just cook all day.  The mix of the zesty dressing and BBQ sauce makes the chicken so good.  We ate it how she suggested, over sweet potatoes which is something I never would have thought of on my own, but it is SO good! The next day I make sliders with the left over chicken or I've even used it to make tacos and/or quesadillas.

(I don't usually use the thin sliced breasts, but this was all my store had on that day!)

Zesty BBQ Chicken 

Ingredients: 
4-6 chicken breast
1 bottle Zesty Italian Dressing (we like Kraft)
1 bottle Sweet Baby Ray BBQ sauce

Directions: 
Place chicken breasts in bottom of crockpot sprayed with Pam.
Cover with dressing and BBQ sauce.
Cook on low for about 6 hours or until chicken falls apart easily.
Remove chicken and shred with two forks.
Strain remaining sauce to use as topping.

Like I mentioned above, we eat this chicken over baked sweet potatoes and for that I generally use 4 sweet potatoes.  I wash and dry them first. Then pierce them with a fork all over, spread olive oil on the skin and sprinkle with a little salt. Place them on a baking sheet lined with foil and bake at 400 degrees for about 45 minutes to an hour based on the size of your sweet potatoes.  When they are done the skin should wrinkle a bit, the caramelized juice will start to ooze out and a fork should slide in easily when they are fully cooked.  When you are ready to serve simply slice the sweet potatoes in half, smoosh the sides to make room for the chicken. After topping with chicken you can drizzle some of the extra sauce on top and even add a little shredded cheese (not pictured).

The chicken is also delicious as a BBQ sandwich or you can make little mini sliders on Hawaiian Rolls, which my kids love! It's a simple, no fuss dinner recipe that my family loves!

Follow us on Pinterest HERE.
Follow us on Instagram HERE.
Follow us on Facebook HERE.
Follow us on Twitter HERE.

Monday, April 20, 2020

Kitchen Confessions: Easy Twice Baked Potatoes

Here is a confession from my kitchen. I feel like it has been used more in the past 5 weeks than it has in the past 5 years.


I'm not even exaggerating.  I'm not one that loves to cook and a big part of that is because I used to never have the time.  Between rushing the kids from school to sports and lessons and everywhere else we used to go, there just wasn't time.  We did a lot of drive-thru (I'm convinced we kept Chick-fil-a in business), take-out, and eating on the go. Sure I made a few dinners a week, but they were all quick and easy things and more out of necessity than enjoyment.

The first few weeks I was SICK of cooking.  I couldn't believe my family really expected me to feed them breakfast, lunch, and dinner EVERY single day.  Kinding...kind of.  Now that we have gotten into the groove of quarantine life and are literally home all day every day, I feel like I am enjoying cooking or at least planning our meals just a *little* bit more.  That is not to say I cannot wait for our busy life to return, but at least I'm making the most of being stuck at home.

Thankfully the weather has been really nice so we've been grilling a lot.  Over the weekend the Mr. grilled steaks and I made twice baked potatoes to go with them.  This is something I never would have made before because I didn't have time and I needed quick sides.  However, since we were home all day Saturday I baked the potatoes and got them ready earlier in the day so that when we were ready to eat it would just be a quick "twice-bake" to get them ready to serve. They were delicious and super easy to make.

Easy Twice Baked Potatoes

Ingredients:
4 baking potatoes
8 slices of bacon or one package of bacon pieces
1 cup sour cream
1/2 cup milk
4 tablespoons butter
1/2 teaspoon salt
1/2 teaspoon pepper
1 cup shredded cheddar cheese

Directions:
1. Preheat oven to 350 degrees.
2. Pierce potatoes with fork and place in baking dish. Bake for about 1 hour.
3. Cook bacon over medium heat and crumble, set aside.
4. When potatoes are done, allow to cool for 10-15 minutes. Slice potatoes lengthwise and scoop out the inside of the potatoes into a large bowl, saving the skins.
5. In the bowl with potatoes add sour cream, milk, butter, salt, pepper and 1/2 cup of cheese. Mix with hand mixer or in a food processor until blended and creamy, set aside.
6. Spoon the potato mixture back into the skins. Top with remaining shredded cheese and bacon.
8. Bake an additional 15 minutes or until warm.


To make it easier I like to use these packs of bacon pieces in recipes that call for bacon.


Note: I baked the potatoes and prepped them to bake again earlier in the afternoon.  Then, when we were grilling I twice baked them at 350 degrees for about 30 minutes.


These were a hit with everyone and we had enough left over for some of us to have for lunch the next day.  I will definitely be making these again.

Have you been cooking more during your time at home?  What is something you have made that your family loved?

Follow us on Pinterest HERE.
Follow us on Instagram HERE.
Follow us on Facebook HERE.
Follow us on Twitter HERE.

Wednesday, February 5, 2020

Slow Cooker Pizza Pasta Recipe

Easy dinner alert!! Naturally I'm not a food person. I eat like a five year old, and my cooking skills are about equivalent. I have friends that are excellent cooks, and have tried to teach me their ways, share their dinner secrets, and even bring me meals because otherwise they know my poor family would be eating tacos Monday through Friday.

Not that there is anything wrong with tacos. Because...well, tacos.

But, long time readers know I love a good slow cooker recipe. Carrie Beth and I both do. As busy moms who play mom taxi from 2-9p.m. respectively each nice, it's nice to just take a handful of ingredients, throw them in a pot and call it a day. Or in this case dinner.


A few weeks ago, I was looking for a recipe on Pinterest to shake things up in my slow cooker repertoire, and I found a recipe called "Pizza Pasta". I screen shot the recipe on my phone or else I would go back and give the creator a huge shout out. 

The Slow Cooker Pizza Pasta was a huge hit amongst the entire family. Even Mr. Magnolia. And he's a tough sell when it comes to all things involving a crockpot. 

It is really really simple (see those five year old cooking skills) and easy to adjust to your own tastes. 

And it tastes like pizza. Which everyone knows is the second major food group behind tacos. 


Here's the quick and easy recipe...


SLOW COOKER PIZZA PASTA

Prep Time - 10 mins
Total Time - 1.5 hours

INGREDIENTS
  • 1 jar of pizza sauce
  • 1 box of penne pasta
  • 1 pound of ground meat (I used a mixture of ground sausage and ground turkey.)  
  • 3 cups of shredded mozzarella cheese
  • Optional: sliced pepperoni 


INSTRUCTIONS
  • Cook pasta according to instructions.
  • Brown meat(s).  


  • Mix pasta, meats, and sauce in a large bowl. 


  • Layer pasta mixture with cheese in slow cooker.  

  • Cook on low for 1 - 1.5 hours.  


  • Serve and enjoy! 


Have any slow cooker recipes that even a five year old can make? If so, share with me! It's always good to have a little something up my sleeve to really "wow" the fam. ;) 


Come spend the day with us on:
Instagram | Pinterest | Facebook | Twitter |


Monday, March 25, 2019

Kitchen Confessions: Easy Quiche Recipes

A few weeks ago on Instagram Stories I shared that I was going to try making a quiche for dinner and that I would share the recipe if it turned out ok.  Well, it turned out great and my family all loved it! So I decided to try another recipe and they loved that one, too.

Every time I think about or eat quiche I think about a time in college when a friend of ours spelled it "keesh" during a game we were playing. I am a horrible speller, but even I knew quiche started with a Q.

We like to have quiche for dinner and eat the left overs for breakfast. I usually just add a salad or some fruit with it and call it a meal.  I usually buy quiche pre-made at Costco, but hen after making my own I don't think I'll go back.  For both of these I doubled the recipe and baked them both at the same time. Then I froze one to be able to pull out at a later date.


One thing I did that made it an easier recipe to put together was use a jar of this Hormel Real Bacon Pieces for each of them instead of cooking and chopping bacon.


Spinach and Bacon Quiche
Paula Deen original recipe HERE. I made a few edits to the recipe so noted that below!


Ingredients:
5 eggs
1 cup half and half cream
salt and pepper
2 cups chopped fresh baby spinach
1 jar (3 oz) real bacon bits
1 1/2 cup shredded Swiss cheese
1 9 inch refrigerated pie crust

Directions:
1. Preheat oven to 375 degrees
2. Fit pie crust to glass pie dish
3. Layer spinach, bacon and cheese in the bottom of the pie crust.
4. Whisk eggs, cream, salt and pepper and pour egg mixture on top.
5. Bake for 35-40 minutes or until egg mixture is set.


Bacon and Cheese Quiche
Both of these recipes were ones I just searched really quickly in the grocery store. I could not find the original source for this one, but have included the substitutions and the way I made it below.


Ingredients:
1 jar (3 oz) real bacon bits
1 Tbs. dried minced onion
1 1/2 cups shredded Swiss cheese
1/2 cup grated Parmesan cheese
1 9 inch deep dish frozen pie crust
4 eggs, lightly beaten
1 cup half and half cream


Directions:
1. Preheat oven to 400 degrees.
2. In medium bowl mix bacon, onions, and both cheeses.
3. Mix eggs and half and half in a bowl. Pour the egg mixture over the cheese mixture.
4. Bake in preheated oven for 15 minutes. Reduce heat to 350 degrees and bake for an additional 30-35 minutes or until top of quiche begins to brown.


Do you have a favorite quiche recipe?

Follow us on Pinterest HERE.
Follow us on Instagram HERE.
Follow us on Facebook HERE.
Follow us on Twitter HERE.

Tuesday, January 8, 2019

Kitchen Confessions: Simple Taco Soup

It's been quite a while since our last Kitchen Confessions post so I figured it was high time to share something we've been eating lately. Weeknights are the hardest because we are so short on time. Between practices for three kids in multiple sports, finding a night that I am home with nothing to do except cook dinner is rare!  I love quick and easy meals that are a crowd pleaser and this simple taco soup is just that.  I can put it all together in my crockpot in the morning after the kids get off to school and know that it will be ready for us to eat anytime we happen to get home that evening.

We actually had this for the first time at my good friend A's house on Halloween. She had made a big batch of it for us to eat before trick-or-treating. I got the recipe from her and altered it just a bit to fit my kids' tastes, and have made it several times since then.  Starting back to school this week I knew I needed to plan for some easy meals and this was on the top of the list!


Simple Taco Soup

Ingredients:
1 pound ground beef
1 envelope taco seasoning
1 1/2 cups water
1 can (16 ounces) mild chili beans, undrained
1 can (15 1/4 ounces) whole kernel corn, drained
1 can (15 ounces) pinto beans, rinsed and drained
1 can (10 ounces) Rotel
1 envelope ranch salad dressing mix

Directions:
1. Brown ground beef in a skillet over medium heat until no loner pink. Drain.
2. Add taco seasoning and mix well.
3. In a crock-pot, add all ingredients including ground beef. Cook on low for about 8 hours or on high for 4-6 hours.
4. Stir and serve with Fritos.
5. Garnish with sour cream and/or shredded cheddar cheese.
6. Enjoy!

If your kids are anything like mine, they will love this because they get to eat it with chips!  That makes everything taste better, right?!

Follow us on Pinterest HERE.
Follow us on Instagram HERE.
Follow us on Facebook HERE.
Follow us on Twitter HERE.

Monday, November 5, 2018

Kitchen Confessions: Creamy Sausage Rigatoni

Happy Monday friends! We had the best weekend - we cheered on our favorite soccer star, caught up on house projects, and celebrated Carrie Beth's birthday. It was a good one. Daylight savings though has rocked my world. As always it has taken me by surprise and has me all thrown off.

Can we not do away with this mean little trick? It's voting week...can we add "Do away with Daylight Savings" to the ballot? I mean, if a candidate made that as their platform they've got my vote. I have a feeling all the parents will be behind the movement.

We wrapped up the weekend with a yummy Sunday night dinner. Sunday nights tend to be our only calm dinner night of the week. Typically it's the only night of the week the whole family is home, so we try to at least attempt to sit down to a good meal. At an actual table.

I've share this dinner on Instagram before, so if you've seen it there, I apologize. But I feel it's just too good not to show it a little more Internet love.


This Creamy Sausage Rigatoni is delicious! It's quick and easy to make - my main requirements for dinner when I'm in charge.  And it's a meal the whole family enjoys. That alone qualifies it for meal of the year.

How to make Creamy Sausage Rigatoni

Serves: 6-8
Total Time: 25 mins

Ingredients

  • 1 lb. of Rigatoni pasta, uncooked
  • 1 lb. of Italian sausage
  • 1 24 oz. jar of Marinara sauce
  • 1 8 oz. package of Philadelphia Cream Cheese, cubed
  • 2 cloves of garlic, minced
  • 1/2 cup of Basil leaves, torn
  • 1/4 cup of Parmesan cheese, shredded


Directions


  1. Cook pasta as directed on package. 
  2. Remove sausage from casings (if necessary), and crumble over stove top in a large skillet. Cook on medium heat, stirring until brown.
  3. Add garlic and stir for 30 seconds. 
  4. Add pasta and cream cheese. Mix well. 
  5. Cook on low heat stirring frequently until cream cheese is melted. 
  6. Drain pasta and place in large bowl.
  7. Add sauce mixture to bowl and stir frequently until well mixed. 
  8. Top with Basil leaves and Parmesan cheese. 
  9. Serve and enjoy! 


Happy Eating! 


Come spend the day with us on:
Instagram | Pinterest | Facebook | Twitter |

Wednesday, October 3, 2018

Kitchen Confessions: Simple Sheet Pan Supper

It's no secret I don't love to cook. It's not really that I don't like to cook, but that I usually don't have the time. Between running kids around, helping with homework and getting everyone to their practices and games every evening, I'm usually rushed to figure out something for everyone to eat.

I finally found something that is an easy week night dinner and one that makes *most* everyone happy.  Simple Sheet Pan Suppers are my new go-to.


Literally you just chop up some vegetables, add some meat and seasoning, and bake.  One dish, one healthy meal, one less night to have to worry about dinner.


Plus, it's so very colorful that makes me feel good about feeding my family!  There are so many variations of this meal. Just by swapping the vegetables, meat and marinade you can come up with a ton of different meals!


I'm sharing this recipe and a few ideas for switching it up over on Savvy Sassy Moms. Be sure to head over and check it out!

Follow us on Pinterest HERE.
Follow us on Instagram HERE.
Follow us on Facebook HERE.
Follow us on Twitter HERE.

Related Posts

Related Posts Plugin for WordPress, Blogger...