Showing posts with label Home Tour. Show all posts

Tuesday, December 21, 2021

Powder Room Wallpaper Project

I have been thinking about, pinning pictures, and dreaming of wallpapering my first floor powered rooms for over a year now.  We've been focused on a pool project all year long so I felt like I couldn't spend too much or take away the focus from that, but I finally decided to ask for the wallpaper to be done as my birthday gift (which was at the beginning of November) because I just wanted to make it happen! 


I looked at samples online, read a lot of different reviews and ultimately decided to go with peel and stick wallpaper in case I didn't love it so it wouldn't damage our walls.  I knew I wanted to do a big pattern for one and something a little more toned down for the other, but we started with just one room to make sure we could actually make it look good.  

I kept going back and forth about my pattern, but my eye kept going back to THIS ONE. One thing I learned during all of my looking is that a lot of places have the same products.  All of the wallpaper specific sites have a ton of the same designs as somewhere like Wayfair and even Home Depot. I ended up ordering mine from Home Depot because I figured the returning would be easy if I decided I didn't like it for some reason and you know what, it's a good thing I did.  I totally did the math wrong and ended up ordering DOUBLE what I needed. Taking back the extra was a breeze though because I could just return it to my local store.  


It sat in a closet for a little over a month because we never had a free day to tackle this project, but I really wanted it done before Christmas so last weekend we got started.  I watched some YouTube how-to videos and we just went with it.  


It was certainly a learning process and we got better the further along we went.  I will be honest that it wasn't easy, but totally doable depending on what level of perfectionist you are.  I think doing a regular wall in a normal room would have been a breeze, but going around our pedestal sink, light fixture, and those dang corners made for a few bad words. We probably spent about 9 hours over two days getting it done, but it was 100% worth it to me.  I use "we" very loosely.  Actually, my handy hubby did it all and I was just there for moral support and to hand over tools when needed. 


I can't stop staring at it every time I walk by and I just can't get over how it changed the look of that room.  It's not perfect, but it's pretty darn good and with such a busy pattern I think we're really the only ones who will know where the mistakes are unless you are looking for them.


Not 5 minutes after we were done I asked him if he would be up for doing the other power room. He said he needed a minute, but I'm pretty sure I can convince him to get that one done.  Maybe that will be a project for 2022! 


Follow us on Pinterest HERE.
Follow us on Instagram HERE.
Follow us on Facebook HERE.
Follow us on Twitter HERE. 

Thursday, September 16, 2021

Pattern Mixing Throw Pillows with Christy B. Home


Slowly, but surely, I'm getting to the fun portion of our house remodel. The decorating part. I've tried to do a great job of reusing what we had at our old house. I've rearranged things in different spaces, and donated anything we know we aren't going to use. 

The porch is one thing I LOVED at our old house. I remember picking out every single detail and feeling like it was the perfect outdoor entertaining space for our family. It was cozy, functional, and that couch is nap worthy comfortable. 

The new porch space is about the same size, so it was a seamless fit of all my favorites. But it's been five or so years, and mama needed some new throw pillows. 

Well, don't we always need some new throw pillows?


I stumbled across Christy B. Home and instantly fell in love with Christy's custom pillows.  She makes pattern mixing look so easy and has so many great mix and match options on her site. 


She offers a wide selection of sizes, tons of great patterns and colors, and even great styling tips too! 


The second I saw the Lonny Grass pattern, I knew I was in love. It's a bolder option than I typically gravitate towards, but Carrie Beth saw it and confirmed that it was just as amazing as I thought and would be the perfect addition to my porch space. I paired two 20x20 pillows with a few lumbar pillows in the Diamonda Pattern, and it is a match made in pattern mixing heaven.


Christy B. Home pillows are luxurious and made with high quality fabrics and the utmost attention to every single detail.  Christy's interior design background really shines through in all of her collections. She currently has three lines: The Garden Girl, Tropic Fun, and Coral Costa


The pillows I ordered are from the Garden Girl line, but you can't go wrong with any. I already have my eye on a few more I'd like her to make for me. 

I just have to figure out how to sneak them past Mr. Magnolia. 
#confesstionsofathrowpillowaddict


This is a new venture for Christy, and we would love for you guys to stop by, say hi to her on Instagram, and show her you love a good throw pillow just as much as we do. 


Which Christy B. Home Collection is your favorite? 


Come spend the day with us on:


Tuesday, September 14, 2021

10 Tips For Adding Fall Style To Your Home {Including FieldBouquet's Fall Florals}

Thank you FieldBouquet for sponsoring this post. All thoughts, ideas and opinions are our own. 

It’s almost FALL!!!!  That doesn’t necessarily mean a whole lot her in the South where it still feels like summer, but we can pretend and wish for leaves starting to change and the temperatures to cool off a bit. Hopefully where you live you are getting a taste of fall. Heading into a new season with a couple of fun holidays gives us the perfect excuse to decorate our homes! We’re sharing 10 easy tips for adding fall style to your already existing home decor. 

1. Fall Florals 


Fall colors are so beautiful and an easy way to add some of those colors to your home is with flowers!  FieldBouquet is an affordable boxed flower delivery service.  They deliver prearranged flowers to your home, business or workplace   Each fresh bouquet is specially prepared to fit within the provided vase. We love the Forever Spain, Forever France, and Forever Italy bouquets because they are full of fall colors. 


The sunflowers paired with deep red and orange roses is the perfect addition to our fall decor.  The perfect thing about FieldBouquet is you can be assured you will have a beautifully styled bouquet and it takes all of the guess work out of having to fuss with it yourself.  Plus, the fact that it is delivered right to your doorstep is a major time saver.  Having a dinner party, hosting a baby shower, planning an event?  This is the perfect affordable option

2. Accent Pillows 

One of our favorite ways to decorate for a new season (and probably the easiest way) is to use decorative accent pillows. Adding pillows here and there is a simple way to bring some fall color and a touch of the holiday to your homes.  From porch swings, hearths, couches and sitting areas, you’ll be amazed what some plaid or themed pillows will do to make your home feel cozy and comfortable for fall. 
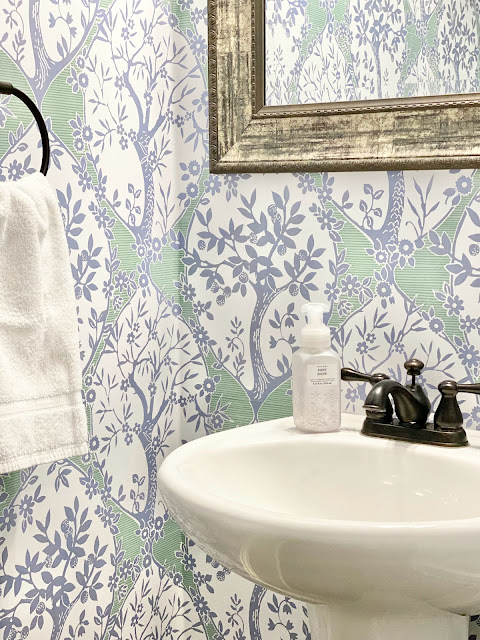

3.  Fall Fragrances


In addition to the amazing floral scents of FieldBouquet fall flowers, we also love scented candles and soaps. You know how there are just some scents that you associate with a season?  Anything from Pumpkin Spice to Apple Cider or Cinnamon to Sandalwood will instantly make you think of fall.  Lighting a scented candle or washing your hands on repeat with the scents of fall is sure to bring all the fall vibes. 


4. Light a Fire 


We can’t think of a better way to cozy up in a family room than with a fire going in the fireplace.  However, if you are like us in the south when it still feels like summer in the fall that might not be practical.  You could even just add a basket of firewood on your hearth to give the impression that you plan to light a fire.


5. Extra Layers = Comfy and Cozy 


Fall means cooler temperature and we couldn’t be more excited about that!  Having some extra layers like fuzzy blankets or soft pillows around your home is perfect for fall. Wrapping up in a blanket while reading or watching TV is one of the easiest ways to feel comfy and cozy. Keeping blankets in baskets near seating areas makes them accessible to everyone and gives you all the fall feels just looking at them!


6. Everyday Decor 


One of the best tips for adding any sort of holiday decor to your home is to mix pieces in to what you already have.  There is no need to start from scratch. Just a few little touches here and there can really transform a space.  Some fall floral stems added to greenery already in place, some holiday ribbon around an existing lantern and switch out an existing frame with one of your favorite snapshots from that holiday is a simple way to add a touch of holiday fun to your home. 


7. All about the kids 


Let’s be honest…celebrating holidays like Halloween is just more fun as a mom.  We love making these holidays exciting for our kids and doing extra special things to make this time of year memorable for them.  Holiday books are one of our favorite things to collect and we keep them all in a pretty basket accessible to the entire family.  Not only is it a place to keep all of the books, but it  looks cute, too!  We also love adding little touches to their playrooms and bedrooms so they really get in the spirit! 


8. Don’t forget outside 


If you are like us, not too many people see the inside of your house, but a lot of people probably see the outside!  That’s why we think it’s just as important to decorate outside of your homes as it is to decorate indoors. It’s amazing what some pillows on your front porch, a small pumpkin and lantern will do to make a space feel festive! 


9. Seasonal Serving Pieces 


Is there anything more fun that some seasonal serving pieces?  You could be planning a dinner party, a big shindig or even just a family dinner, but having themed plates, platters or mugs would be the perfect touch.  You don’t have to purchase an entire set of dishes.  Just mix in some holiday pieces with your existing things to give it a seasonal spinoff.  Cute pumpkin bowls, pretty placemats or even just some fun napkins can totally transform your table.  


10. Reusable items 


While it is fun to stock up on real pumpkins of every shape, size and color, the truth is that they rot and you end up throwing them away.  Of course we get real pumpkins for our kids to carve and decorate, but we don’t go crazy.  We’d rather put that money into reusable items that can be pulled out year after year.  We like to add a little something new to our holiday decor each year and sometimes a cute little ceramic pumpkin is all it takes to make us happy and make our homes feel like fall! 


Follow us on Pinterest HERE.
Follow us on Instagram HERE.
Follow us on Facebook HERE.
Follow us on Twitter HERE. 

Wednesday, March 3, 2021

How To Turn Ikea Curtain Panels Into Custom Looking Drapes

I've been slowly making my way through a long list of house projects that I want to accomplish and new curtains for our living room has finally been checked off the list!  When we decided to move our living room furniture into the new media room (more on that to come next week), I knew I wanted to brighten up this room a bit.  

previous living room curtains/furniture 

I loved the old curtains I had made, but they were dark and heavy, and this room doesn't get much light because of all the trees around our house so I wanted something much lighter.  I knew exactly what I wanted to do and could have purchased the fabric to make the panels, but I'd seen a few ideas floating around Pinterest of an Ikea hack and decided to order them and give it a try.  I'm SO happy I decided to go this route because I ended up with custom looking drapes for a fraction of what I would it would have cost if I made them myself and even less than if I had paid someone else to make them for me.  


When I shared on Instagram last week, I asked if anyone would be interested in a tutorial and got a lot of YES responses.  I didn't take the best pictures during the process because I was so excited to be getting them done, but I'll share as much as I can because if you can sew a straight line, you can make these, too! There are a ton of YouTube tutorials that show step-by-step exactly how to customize these panels. If you need more guidance than what I share here, you can always search for a video. 

The Ikea Ritva curtains come as a two pack in both 98 and 118 inch lengths which is great if you have high ceilings and what's even better is the price!  I got the 118 inch length pack of two for only $39!  They are called "white" on the website so I wasn't sure if they would work for me, but a lot of the reviews said they were more of a cream/off-white which is exactly what I needed.  


I debated adding lining to these because all custom drapes are lined and these do not come lined, but I opted not to line them because I really wanted the light to be able to filter through and help brighten up this room. To me what really makes them look custom is adding the velvet trim tape. They would look great alone, but I think adding the trim to them really helps make them look special!  


Because they are 118 inches long the first thing I needed to do was hem them.  The first step is to determine how long your panels need to be and then decide what size hem you would like. I went with a big 6 inch hem, but you could also do a 4 inch hem and have it look nice.  With a 6 inch hem you need 12 inches total extra length because you fold the bottom up once, then again and sew. The easiest way to hem is to fold over the bottom and iron it into place (measuring the length of the hem as you go) and then fold it again while pressing the hem and pinning into place. Lastly, just stitch a straight line across the top where you have pinned. 

bottom of the panel - 6 inch hem

The next step is to pin and sew on your trim.  I went with a 3 1/2 inch velvet trim tape, but there are SO many possibilities.  I purchased my trim at a local fabric store, but I actually found this velvet trim online, too!  I measured the length of my hemmed panels, added a little extra, and multiplied by 4 because I was going to be adding the trim on one side of all four panels.  I needed 13 yards total and it was $14.95 a yard, so not cheap, but I figure it's all about balance since the actual panels were very inexpensive! I layed out my curtains on a large flat area and decided that I wanted the trim to be placed 1 inch in from the side.  I pinned the trim in place the length of the panel (and folded it over the top and under the bottom of the panel).  Next sewing that straight line comes into place again.  Simply stitch along both sides of the trim, removing the pins as you go until the entire thing is secured.  

velvet trim pinned into place and ready to be sewn 

The last step is to add pleating hooks.  This is kind of a cheat way to achieve a pinch pleat look.  Generally, you can sew in pleating tape across the top of your panels. It has these tiny little pockets that you can slip THESE hooks into to achieve the pleated look. The wonderful thing about the Ikea curtains is that they already have pleating tape sewn in which mean one less step. They actually have three ways to hang them, but the pleating tape/hooks make them look the most structured and custom. 
 
back/top of panel with pleating hooks in place 

After slipping all of the pleating hooks into the pleating tape you are done and it is time to hang your curtains!  You'll need some curtain rings to put on your curtain rod. They make rings specifically for pleating hooks, but you don't need to spend the extra money on those because normal rings work just fine!  You just place each hook through a ring and they are secure. 

pleating hooks hanging on regular curtain rings 

This is the finished view from the front. This project is so simple and so worth it for the final look.  


If you don't know how to sew and want to do something similar, you can google "how to use iron trim tape" and see some tutorials for using THIS stuff.  It allows you to hem and add trim tape without sewing.  I'm not sure how well it holds long term, but it would definitely be worth checking out. 

Any questions? Don't hesitate to ask!

Follow us on Pinterest HERE.
Follow us on Instagram HERE.
Follow us on Facebook HERE.
Follow us on Twitter HERE. 

Thursday, October 22, 2020

Home Sweet New Home: One Year Update


It's been one year. ONE. I can't even believe I'm writing this - but it's been one year today since we purchased our new home

We didn't really have a plan other than we knew we were going to renovate it, and it would be some time in 2020 when we moved. If you had told me on October 22, 2019 what the next year would have been like I would have laughed and laughed and laughed at you. Here's why...

New House Thought #1: The bulk of the renovations will be done by end of January, so we will move February Winter Break. 

Reality: We moved in June. Into an unfinished house. 


New House Thought #2: Our current home will sell quick. What will we do about the kids schools? 

Reality: A major pandemic hits the world and we need not worry about things like schools. 

Or homes selling too quick.


New House Thought #3: It will be so nice having a GC (that is not us) taking care of all the details. 

Reality: "Hi. We're GC Mr. Magnolia, his assistant Jen, and our three tiny foreman. Welcome to our remodel!"


New House Thought #4: We can't wait to go pick out all the new shiny home things!

Reality: Is it available on Amazon? (See pandemic comment above.)


New House Thought #5: "Hey kids grab your masks! Mom's painting something."

Reality: "Hey kids grab your masks! Mom's talking to the contractors, picking out flooring, grabbing new towels at Target, standing in the driveway with the landscapers..." 


In short, the things we were most stressed or worried about never came to fruition. Things we weren't even thinking about became the largest hurdles. However - and I'm in the minority of this thinking - I actually think the slower pace and limitations we faced actually made it a more enjoyable process. 

2020 cut out a lot of extra in our lives for a few months. So that freed up a lot of time that Mr. Magnolia and I normally wouldn't have to concentrate on the remodel. Granted lead times, shipping times, and quarantines dragged out the process in some portions of the build (especially towards the end), but having the time to focus on it all made it less stressful. 

It also gave us more time to stare at the house and add an extra project. Or ten. 

All that extra free time allowed us to tackle projects we didn't think we would have time for until next year or the following. 

So pandemic remodeling...honestly not that bad.

From start to finish, construction/remodeling took us about nine months. We still have a few small things to tweak and a few outdoor projects that seem to be dragging, but otherwise we're done! 


Out of all of us, I was the most hesitant about moving and doing a major remodel. In the end, I think it was one of the best decisions we could have ever made. It was fun to do as a couple and as a family. It has been a dream to let our kids have so much space to run around and play. And it has been a much easier transition in terms of schools/activities/lifestyle than I could have ever planned. 

I'll try to share some fun before and afters soon of all the different rooms. It's amazing how much some of the spaces have changed! 


Come spend the day with us on:


Related Posts

Related Posts Plugin for WordPress, Blogger...